Time Blocking For Increased Efficiency
I’ve found that one of the most efficient ways to work is to use time blocks. Shortly this mean that you divide your days in blocks, and focus on a particular task, goal or client during that time.
Using time blocks is a great way to avoid multitasking and switching between tasks, which both make you less effective as you will have a switching time.
One thing you need to figure out how to manage when time blocking is distractions. In our connected world distractions are everywhere and they are created to sweep us in. For example, say that you’ve been working on a task for a client and you are ready to send it over. You open your email and BAAAM! There is that response you’ve been waiting for from another client, a new potential customer have filled out your form online, and oh a discount on a new computer.
Wait… What was I doing again?
I’m sure you recognize yourself. It’s easy to get sucked in to the email and begin managing all that other stuff instead of sending your email.
Therefore, I’ve begun sorting my email into labels. This means that when I’m going to send an email to a client, I open my email filtered on that client. Tadaaa! No distraction.
Okay well, there might still be a task from that particular client, meaning you still need to filter out some distractions. This also means it’s not a perfect solution, but I’m sure it will improve your focus when answering emails.
The idea is based on using automatic filters and folders in your email.
You can make this solution as advanced as you like, but here are some basics.
How to Create Email Labels
1. List all your clients
To automate most of this, begin with listing all your clients.
To create screenshots for this post, I’ve decided to do the practical part of the exercise with my invoicing email, to protect the integrity of my clients. As you’ll see, this is a list of some of the services we use as an agency:
- Slack
- Asana
- Ahref
- Github
2. Creating folders or labels in your inbox
I’m using GMAIL, so I’ll go a head and set up labels based on the categories defined in step 1.
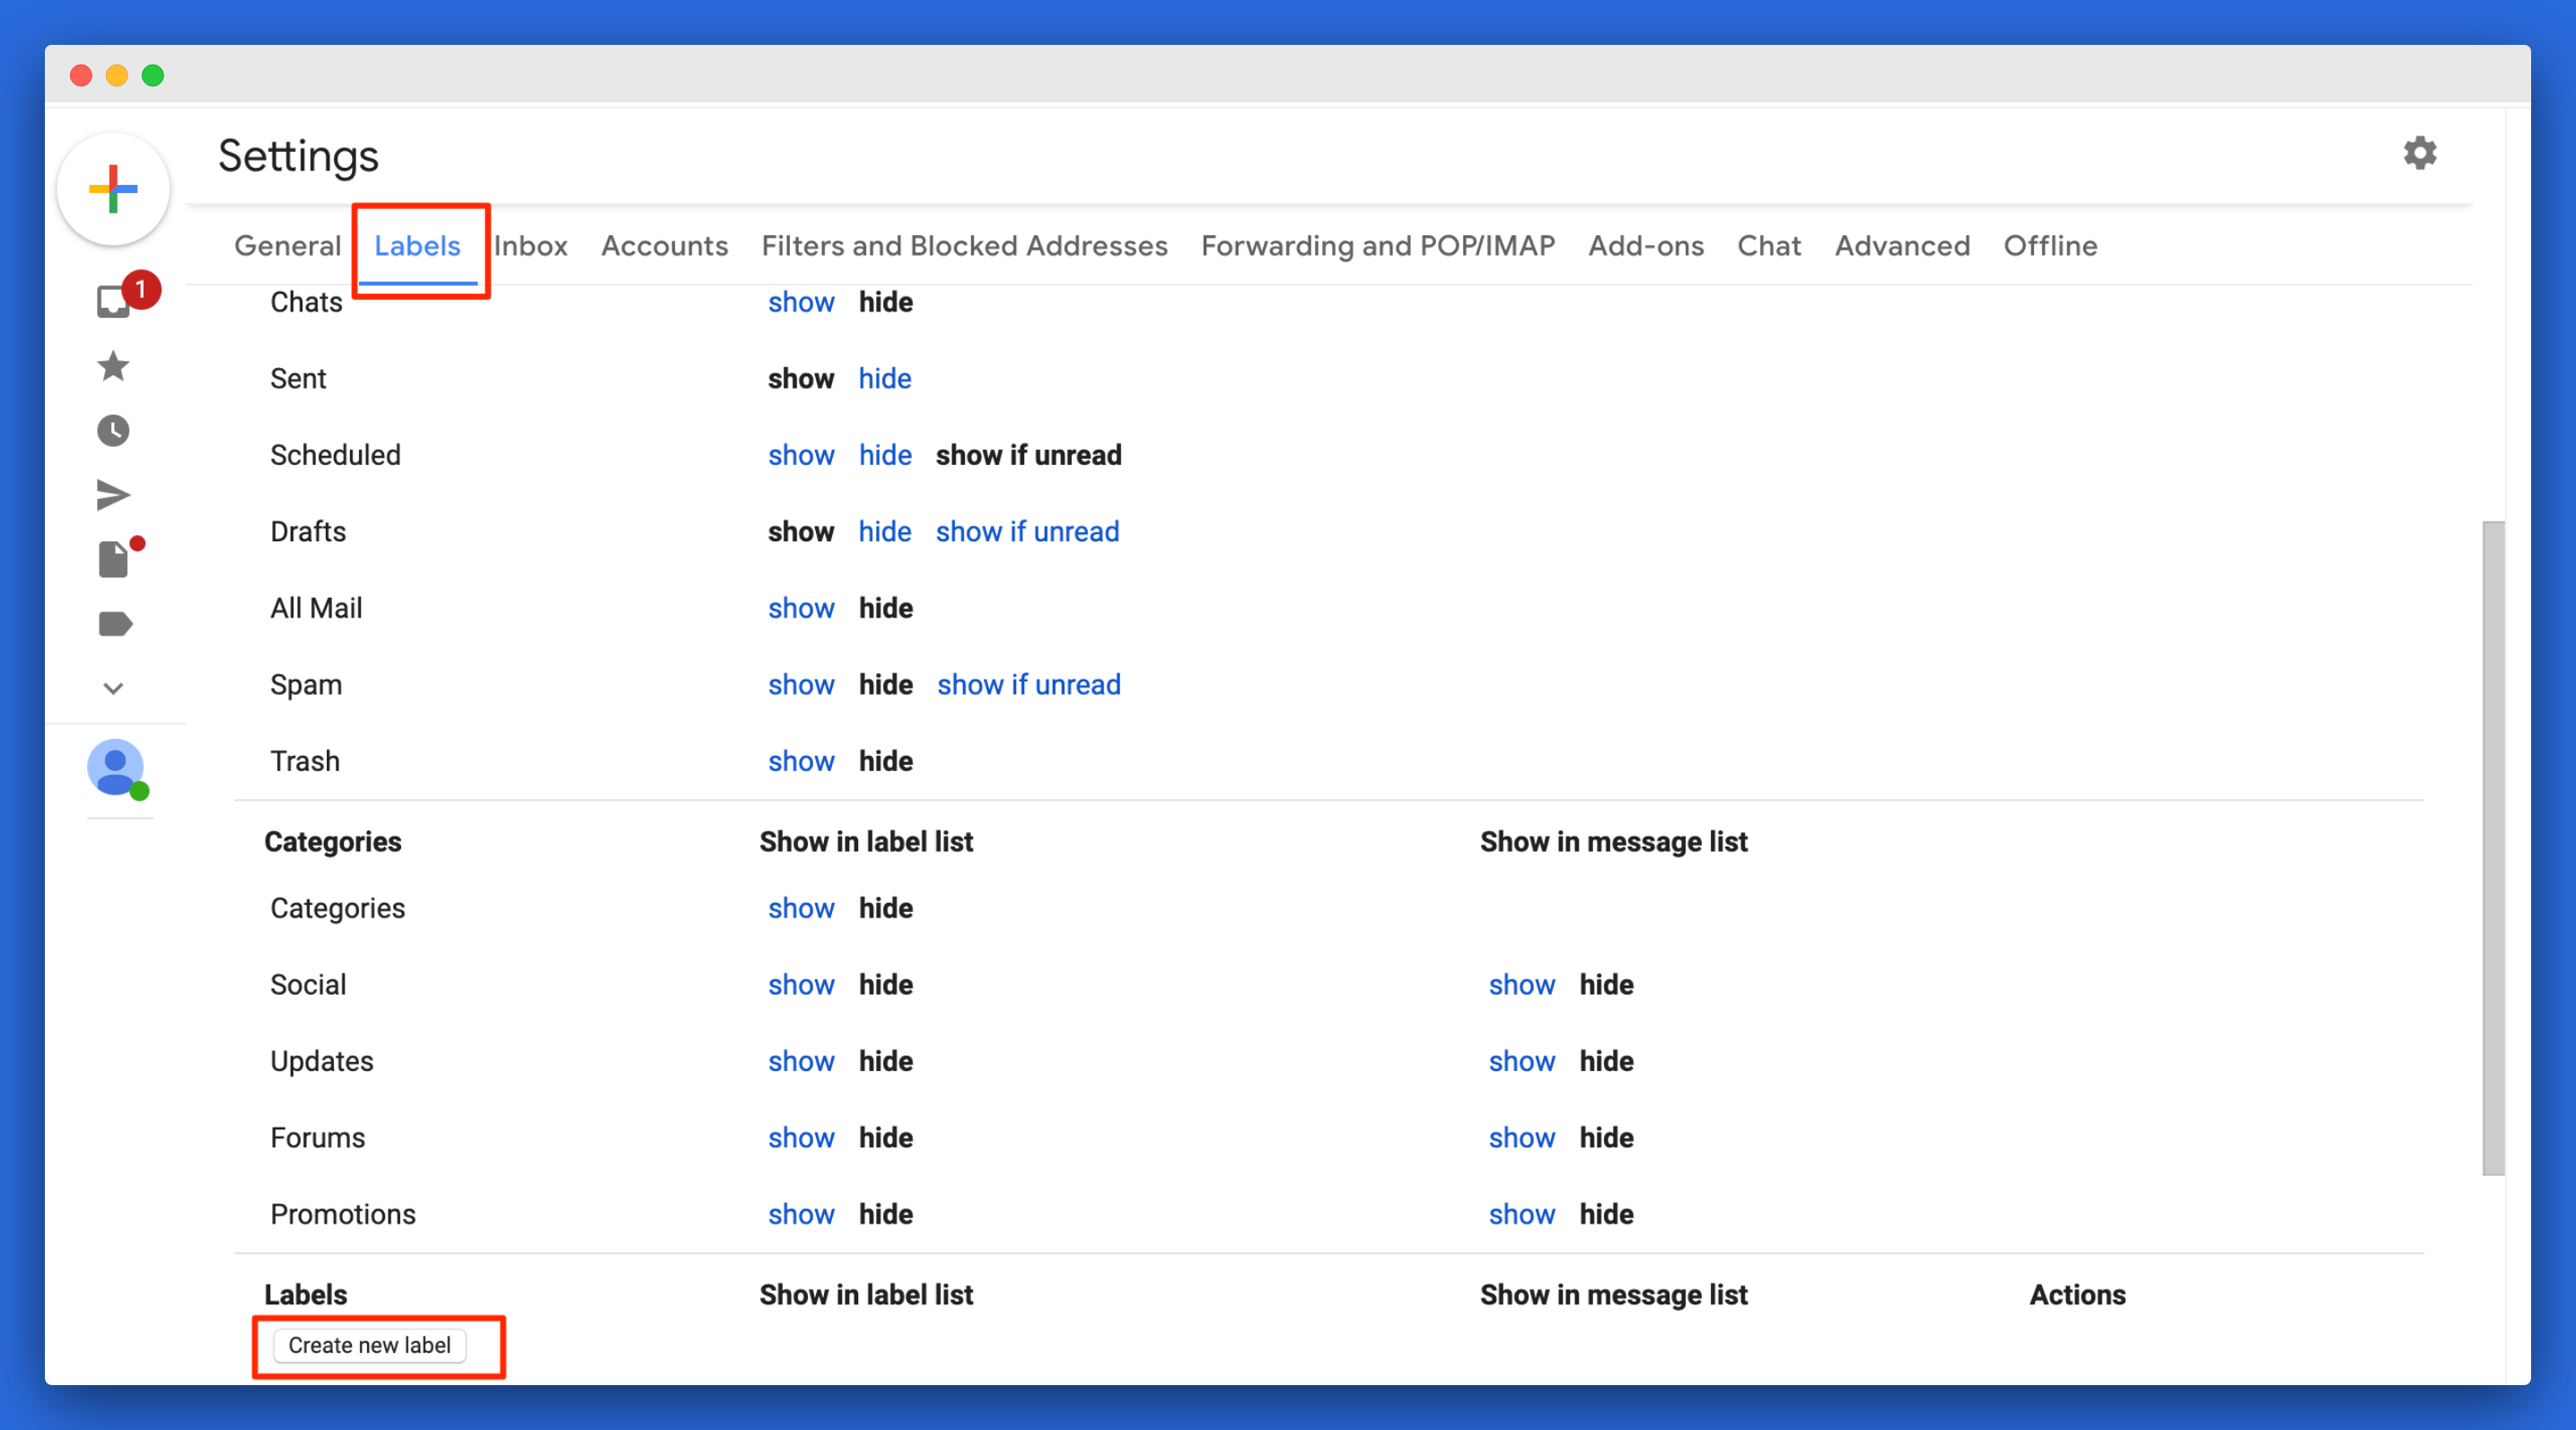
1. Navigate to settings

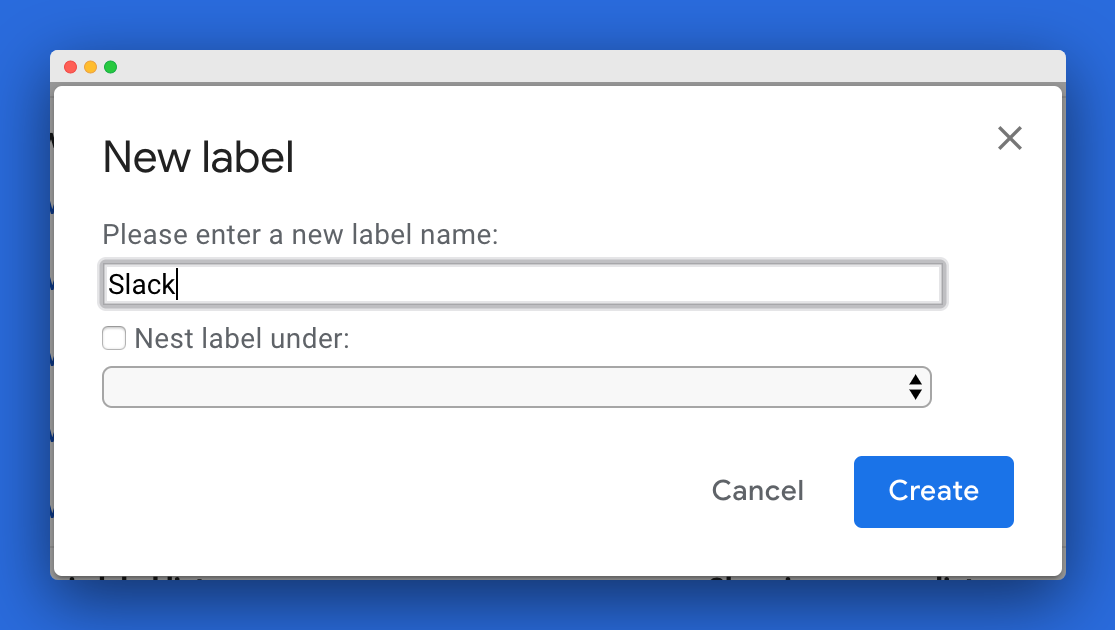
2. Go to labels and choose “Create new label”
You will have to scroll a bit to see the “Create new label” button.
3. Create a filter for each client
4. Set up automatic filters
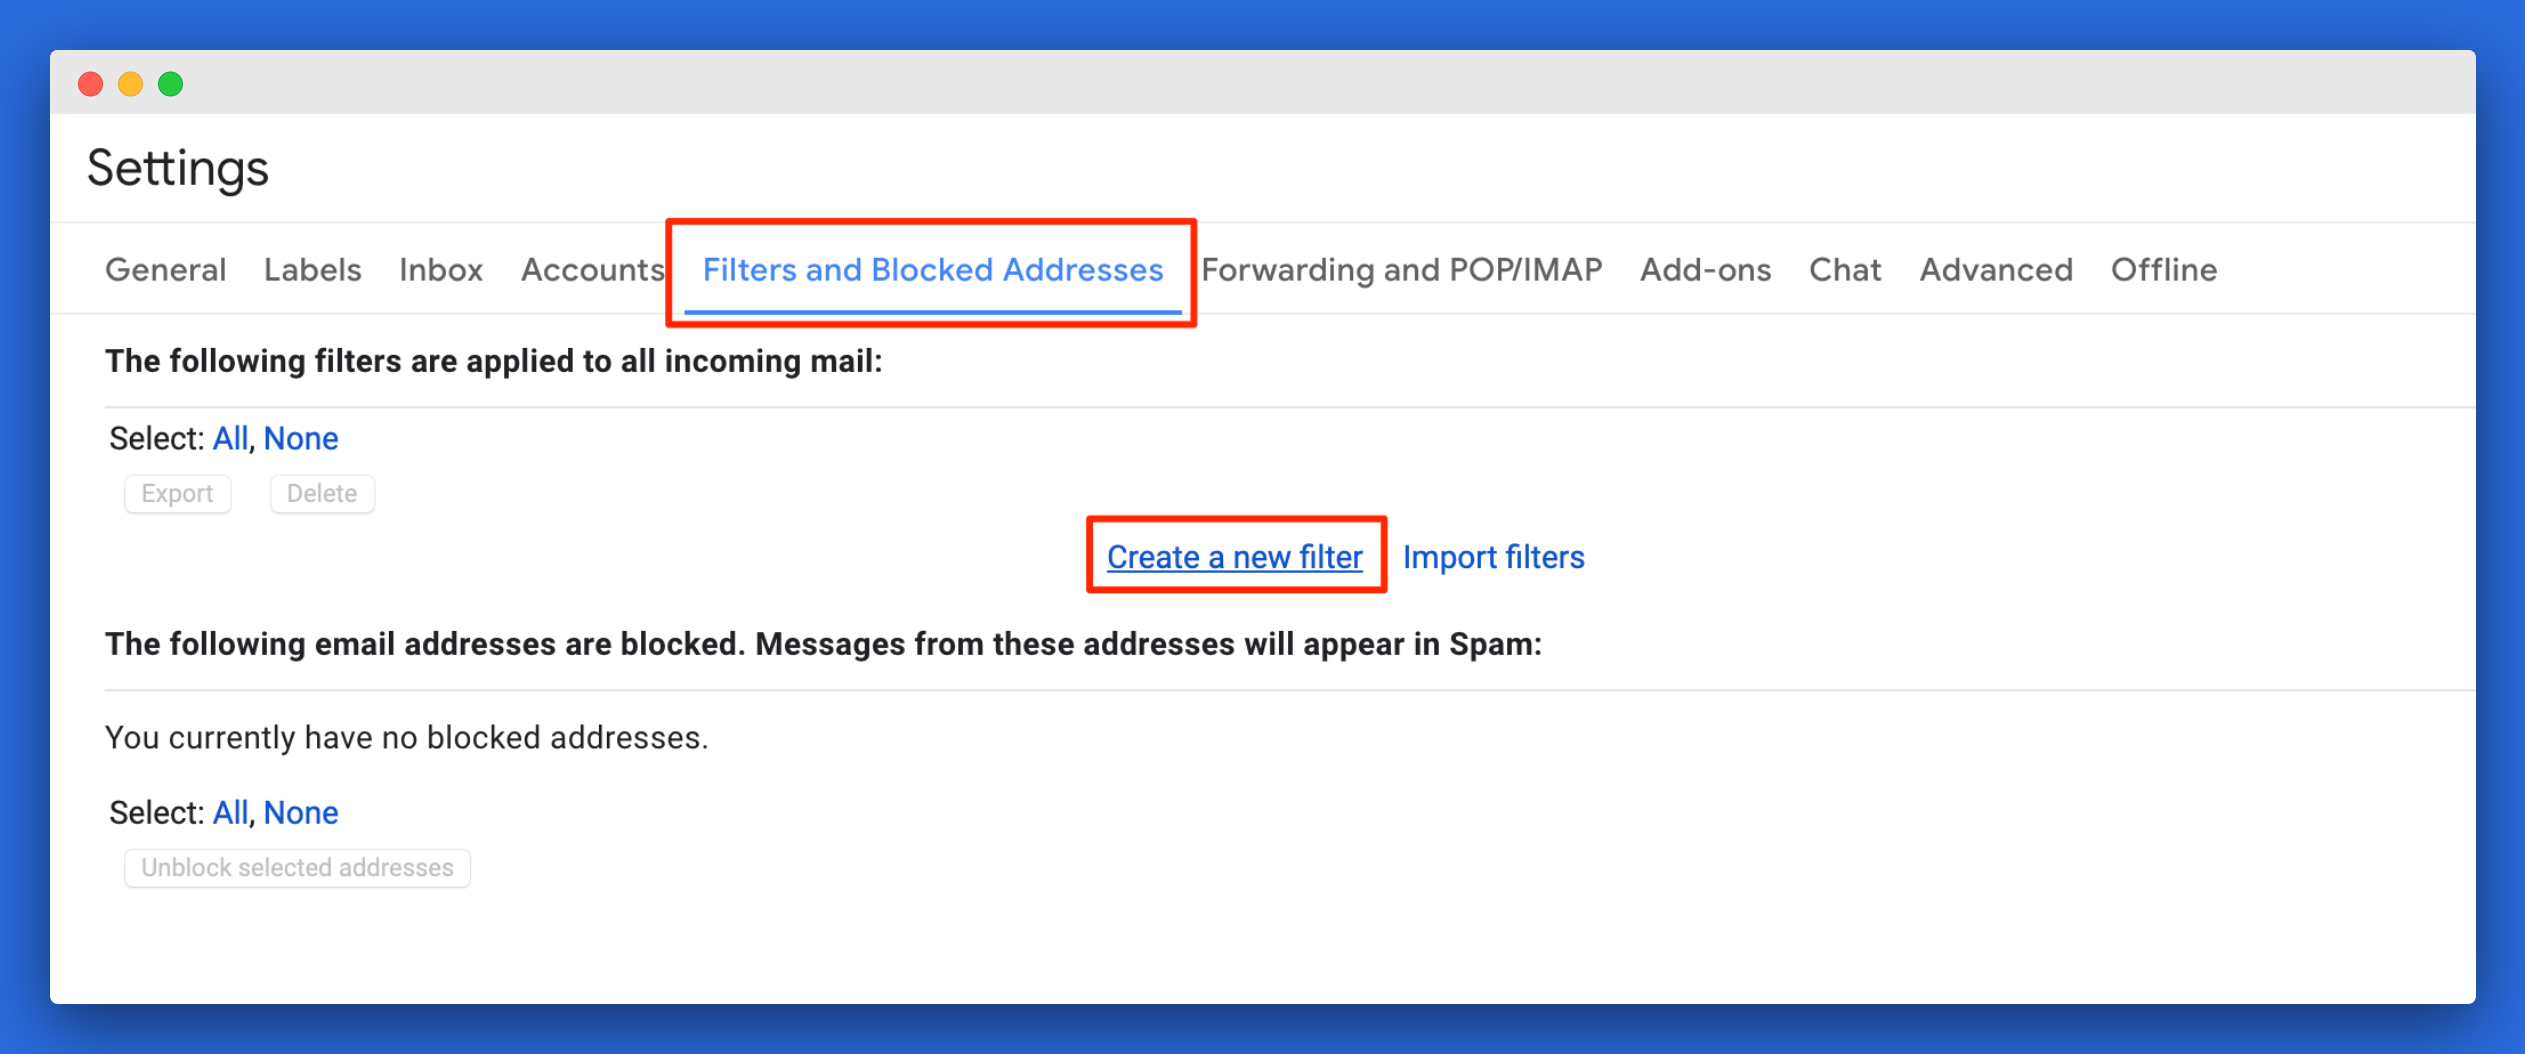
The next step is to set up automatic filters. Navigate to filters and blocked addresses and select “Create a new filter”.
Begin creating your filter by narrowing down the search. I usually start with the name of the client and see what I find. Test your filters by pressing search.
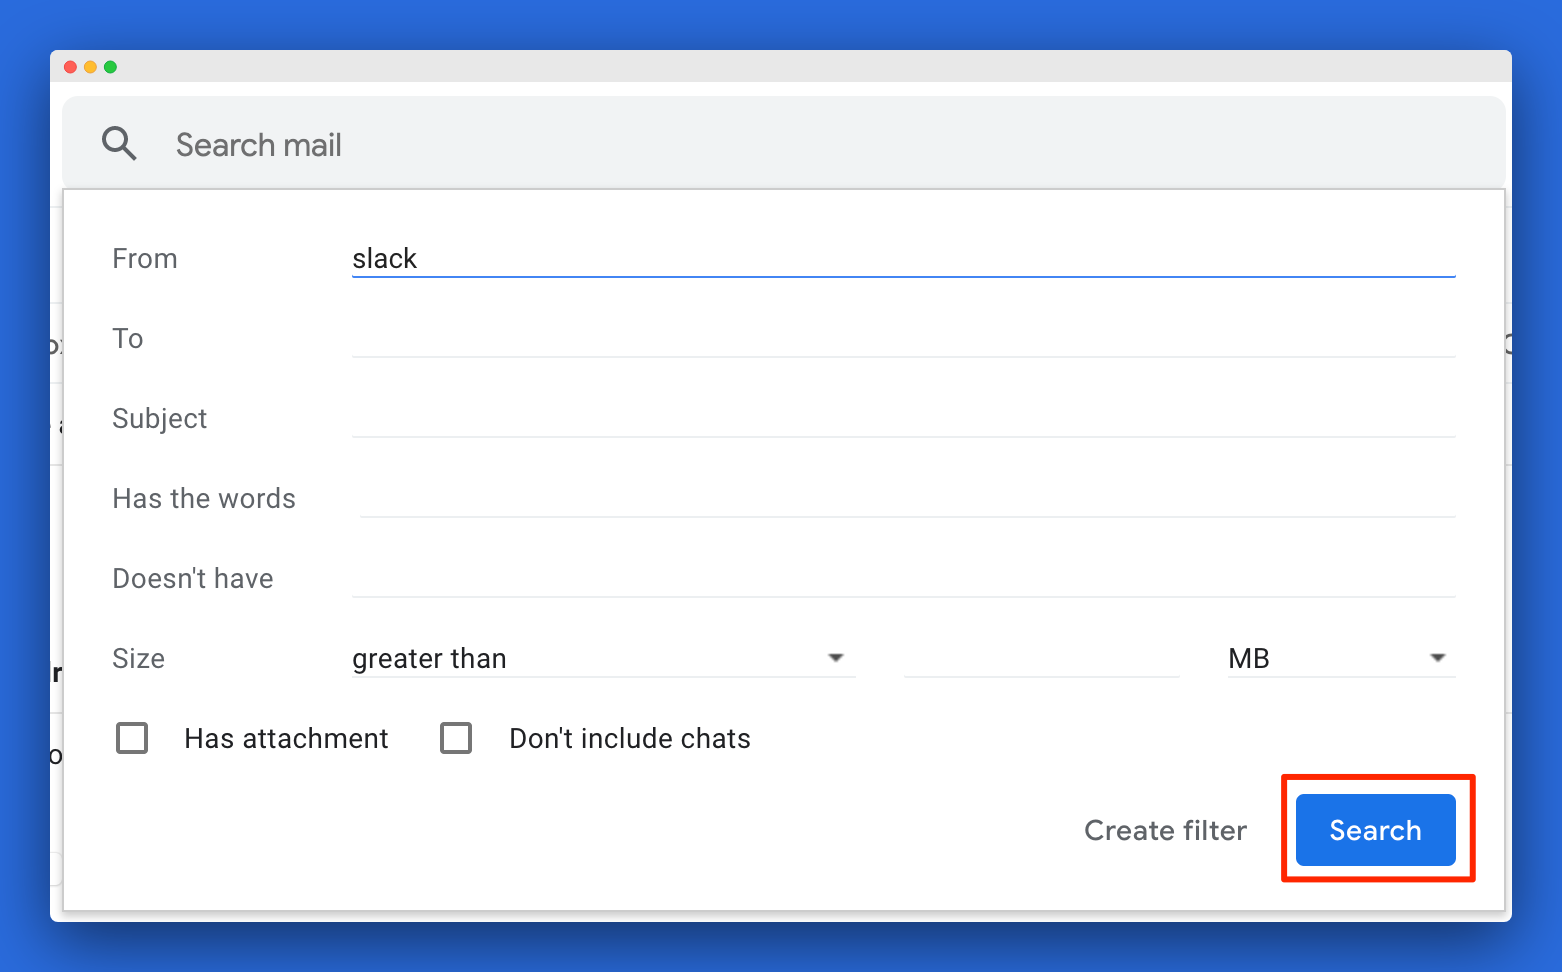
You can also filter by using the domain of that client, for example *@slack.com.
When you’re happy with the list of emails showing up. you press “Create filter” next to the search button.
In your filter, you want to be sure to apply the label you just created. I also mark “Never send to spam” and “Also apply filter to x matching conversations”.
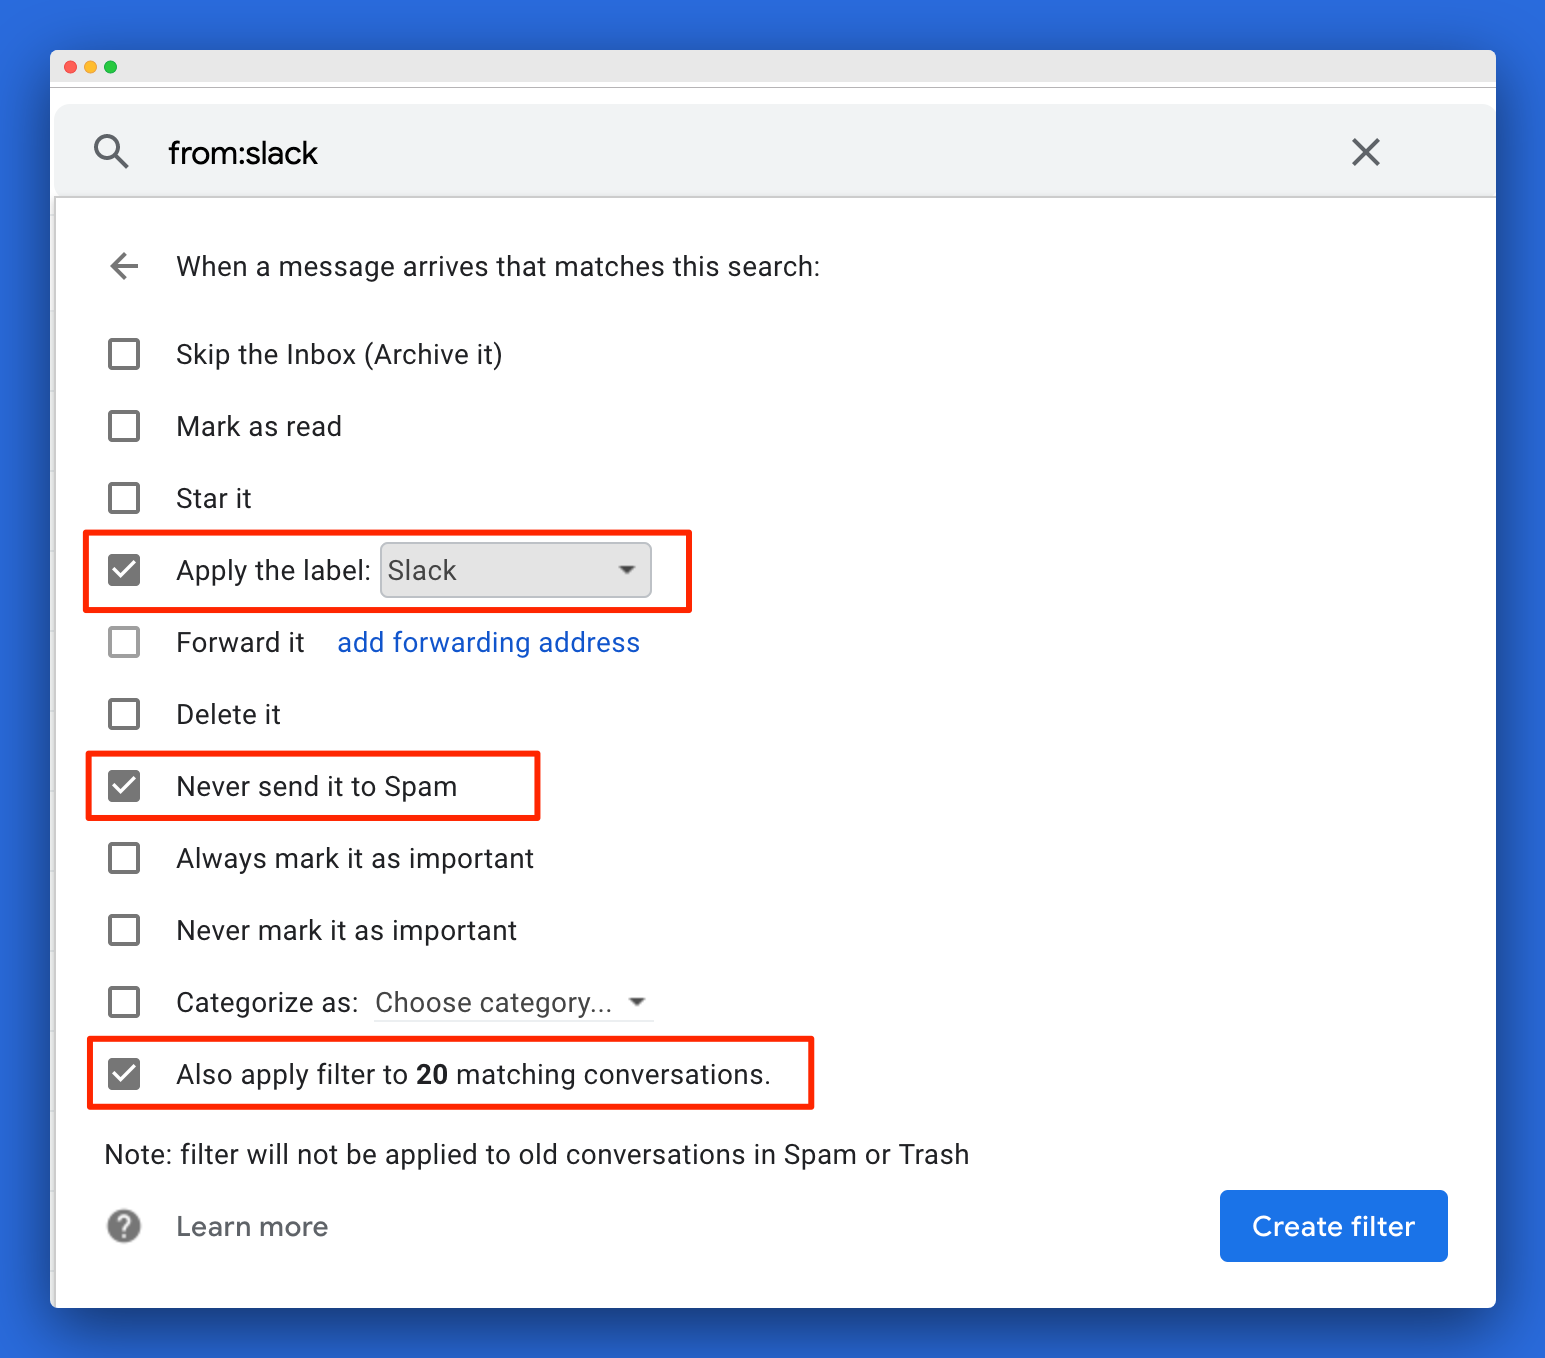
When you press “Create filter” again, you’re done! Now all the emails from that client will have the label you selected.
3. Create a bookmark to the folder
To finish up, you want to bookmark a shortcut to the view with all emails to that client.
In the left menu you will find a list with your labels. Click on the label you want.
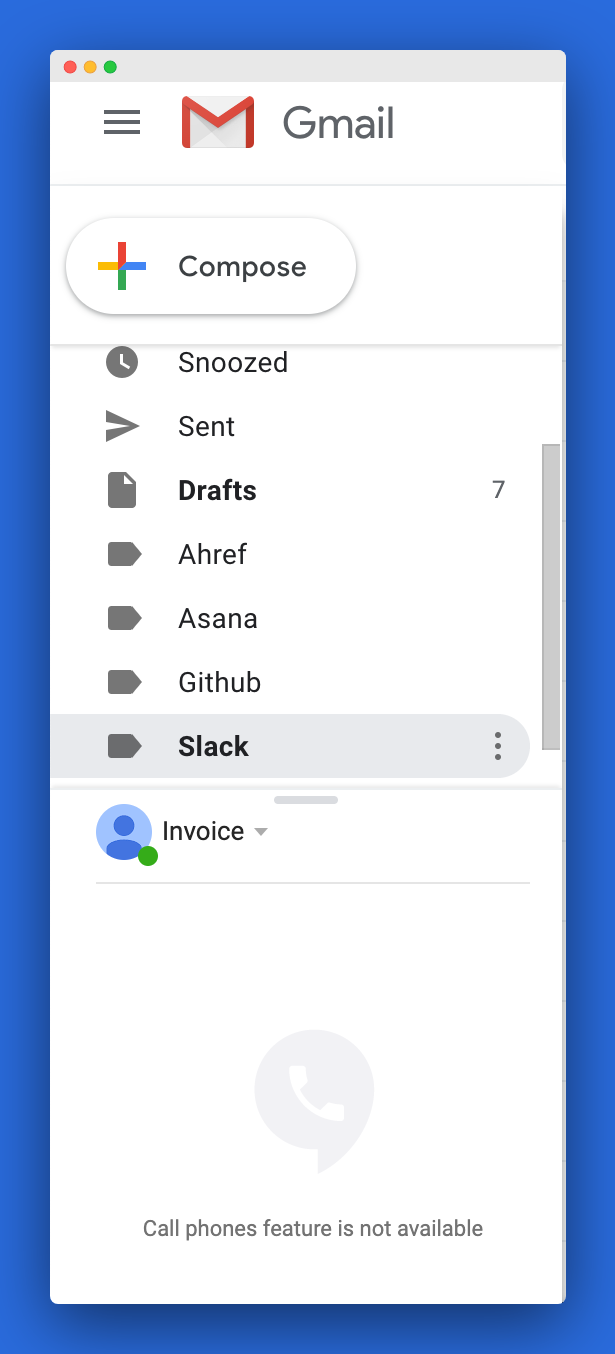
The URL will change to something like this: https://mail.google.com/mail/u/2/#label/Slack
Finalize by creating a bookmark. If you are using Chrome, that’s the star in you URL bar.

You’re done! YAY. Great work!
From now on, when you’re working with a time block for that client, any time you want to send or reply to email, use the direct link to that category and avoid the distraction. Let’s go be efficient!

